Difference between revisions of "Active X - IP"
Jump to navigation
Jump to search
X10douglas (talk | contribs) |
X10douglas (talk | contribs) |
||
| (One intermediate revision by the same user not shown) | |||
| Line 10: | Line 10: | ||
#Click “Internet Options” | #Click “Internet Options” | ||
#Click the “Security” tab | #Click the “Security” tab | ||
| − | #Click “Trusted Sites” under the “Select a zone to view or change security settings” | + | #Click “Trusted Sites” under the “Select a zone to view or change security settings” |
| + | #Move the "Security level for this zone slider" down to '''LOW''', then click '''APPLY''' | ||
#Click the “Sites” button [[Image:TrustedSite2.jpg]] | #Click the “Sites” button [[Image:TrustedSite2.jpg]] | ||
#Click the “Add” button | #Click the “Add” button | ||
#Uncheck the box for “Require server verification (https:) for all sites in this zone” [[File:TrustedSite.png]] | #Uncheck the box for “Require server verification (https:) for all sites in this zone” [[File:TrustedSite.png]] | ||
| − | #Click the “Close” button, then the “OK” button | + | #Click the “Close” button, then the “OK” button |
| + | #Go back to "Internet Options" and click "Custom Level" [[File:IECustom.png]] | ||
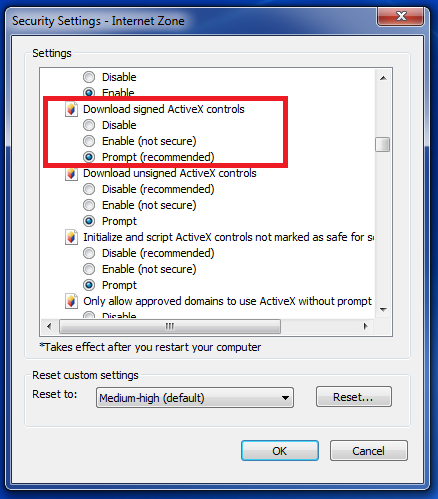
| + | #Scroll down until you see "Download Unsigned ActiveX Controls" and under it select "Prompt" [[File:IEPrompt.png]] | ||
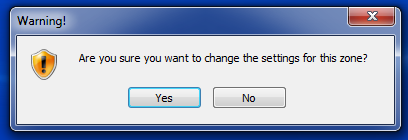
| + | #Click "OK". A warning message will appear, click "Yes" [[File:IEWarn.png]] | ||
| + | #Click "OK" again | ||
#Refresh the browser | #Refresh the browser | ||
Latest revision as of 21:01, 14 December 2015
Question
Internet Explorer won't allow me to install Active X controls for my AirSight IP cameras
Answer
Internet Explorer should prompt you to install Active X controls the first time you visit Your camera's Web User Interface (WUI). If it doesn't, follow these steps:
- Open the camera's WUI in Internet Explorer
- Click “Tools” in the menu bar
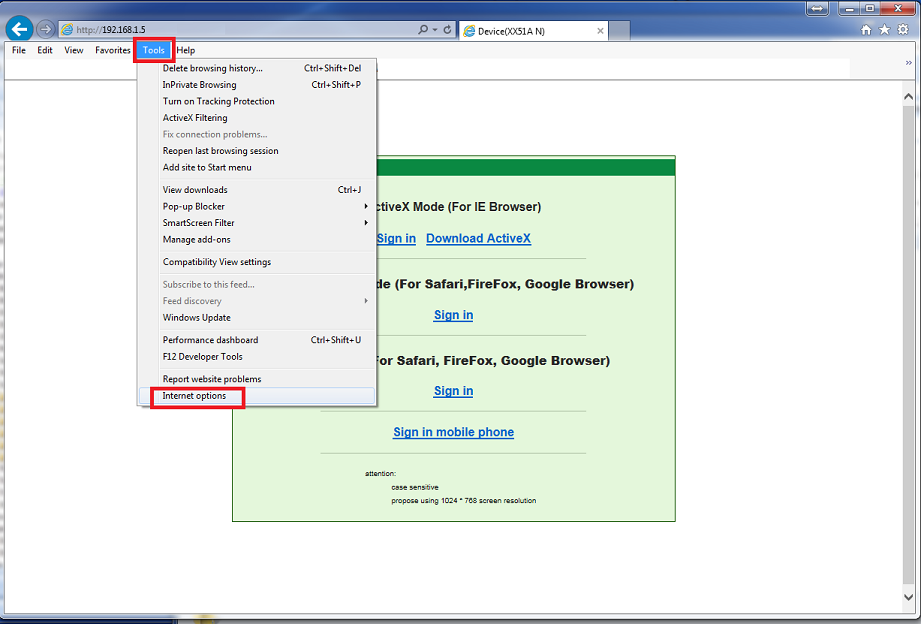
- Click “Internet Options”
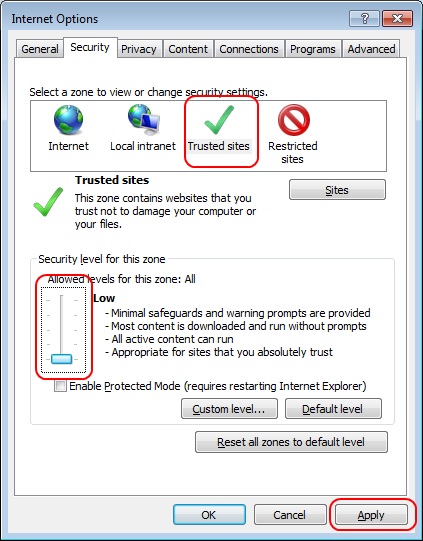
- Click the “Security” tab
- Click “Trusted Sites” under the “Select a zone to view or change security settings”
- Move the "Security level for this zone slider" down to LOW, then click APPLY
- Click the “Sites” button
- Click the “Add” button
- Uncheck the box for “Require server verification (https:) for all sites in this zone”
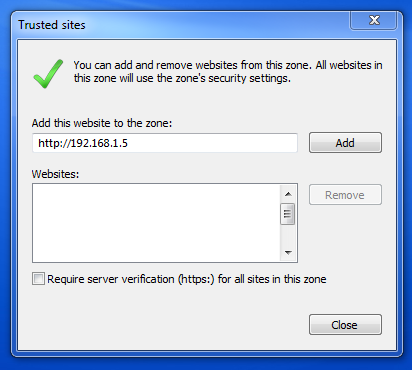
- Click the “Close” button, then the “OK” button
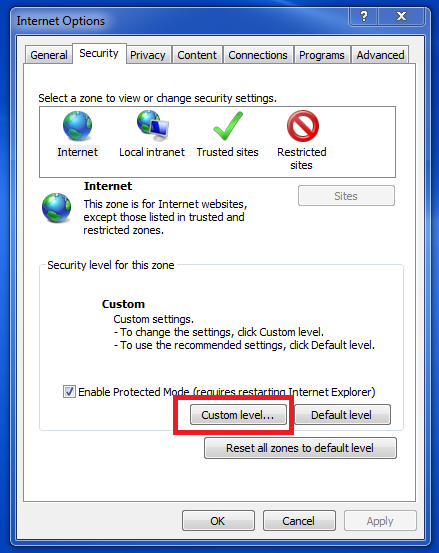
- Go back to "Internet Options" and click "Custom Level"
- Scroll down until you see "Download Unsigned ActiveX Controls" and under it select "Prompt"
- Click "OK". A warning message will appear, click "Yes"
- Click "OK" again
- Refresh the browser


You should now be prompted to install the ActiveX control from X10.