Difference between revisions of "Adding A Camera In IPCam Client"
(→Answer) |
X10douglas (talk | contribs) |
||
| Line 73: | Line 73: | ||
To add more cameras, repeat the process again. | To add more cameras, repeat the process again. | ||
| + | |||
| + | |||
| + | [[category: Configuration]] | ||
| + | [[category: Software]] | ||
| + | [[category: Specifications]] | ||
| + | [[category: Troubleshooting]] | ||
Latest revision as of 00:35, 10 April 2014
Question
How do I add a camera in IPCam Client?
Models XX34A, XX36A, XX41A, XX42A, XX40A, XX39A, XX59A
Answer
There are many ways to view your AirSight cameras. You can view them through an internet browser on any device, or you can install an application to a Windows based PC to view the caemras as well. The following are instructions to add a camera to IPCam Client software:
Click ![]() and it will pop up the following window
and it will pop up the following window
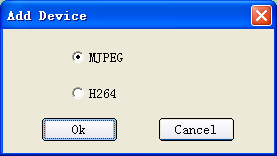
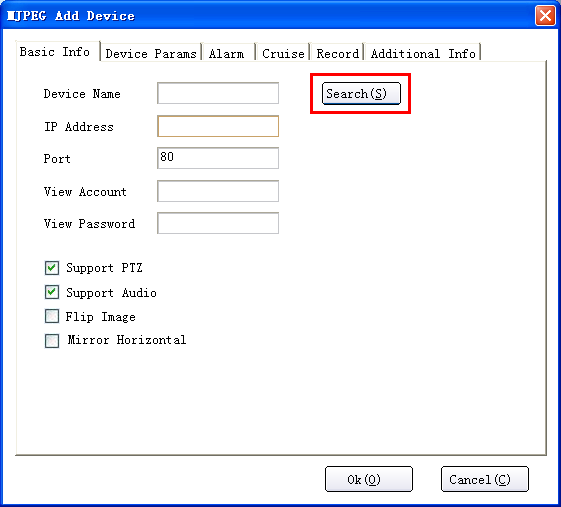
Choose MJPEG, then click OK, this will pop-up the window as shown below. (Or choose
H264 if your camera is model XX39A/XX59A).
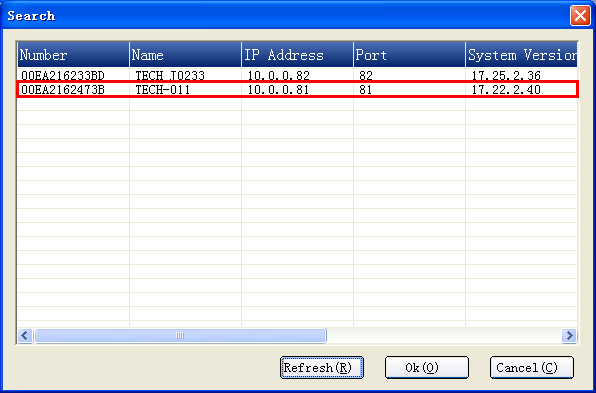
Clicking Search, will pop-up the result:
If there are no cameras listed, check the firmware version to see if it starts with 17.*.*.*. If
the firmware version is correct, and there is still no cameras listed, maybe your computer’s
IP address doesn’t match with the camera’s IP address, or they are not in the same LAN.
Change your computer’s IP address to the same LAN as your camera’s.
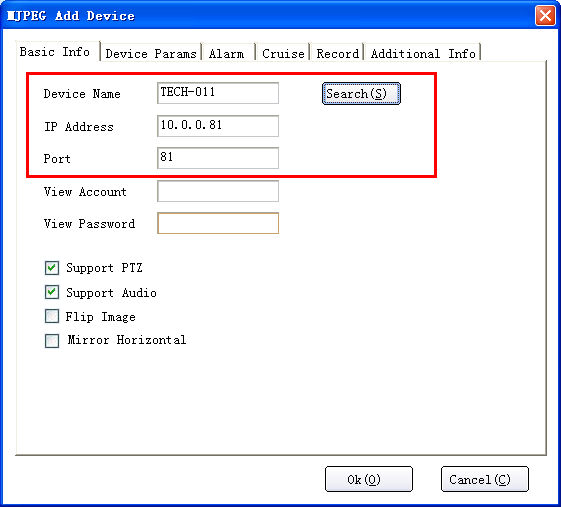
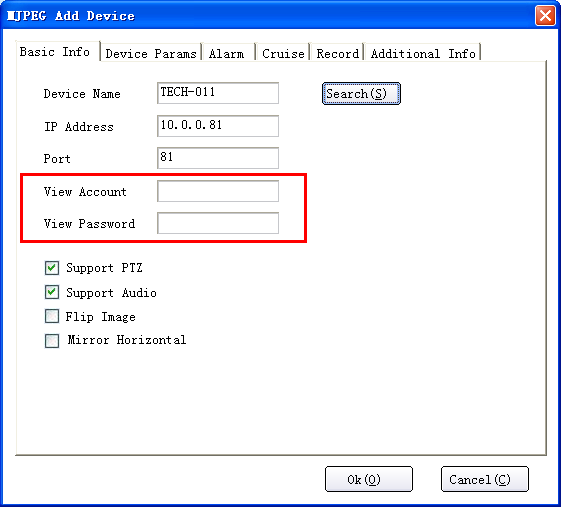
Choose the IP camera, and click OK to show the Basic Info page:
Device Name: The name of the camera.
IP Address: The IP address of the camera.
If you use DDNS to view the camera, enter the DDNS domain name here, remove the
“http://”, for example, if the DDNS http://test.aipcam.com:95 sets successfully, then type
“test.aipcam.com” in the IP Address.
Port: The port of the camera.
Once all this information is shown, the firmware of the camera is correct, and the software
works well, then just enter the View Account and View Password you have set:
View Account: The user name of the camera. (Default is admin).
View Password: The password of the camera. (Default is no password).
Support PTZ: Enable this to active Pan/Tilt/Zoom (if available for your camera type).
Support Audio: Enable this to activate the audio function.
Flip Image: Enable this to vertically flip the image. I.E., for ceiling mount, etc.
Mirror Horizontal: Enable this to horizontally flip (mirror) the image.
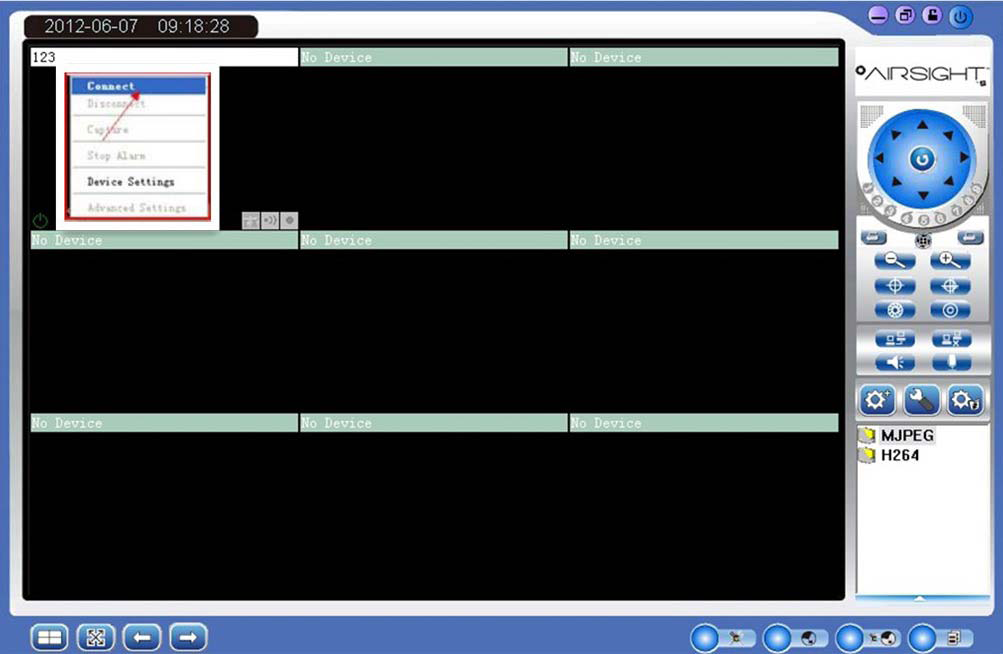
After you’re done, click OK to go back to the software interface:
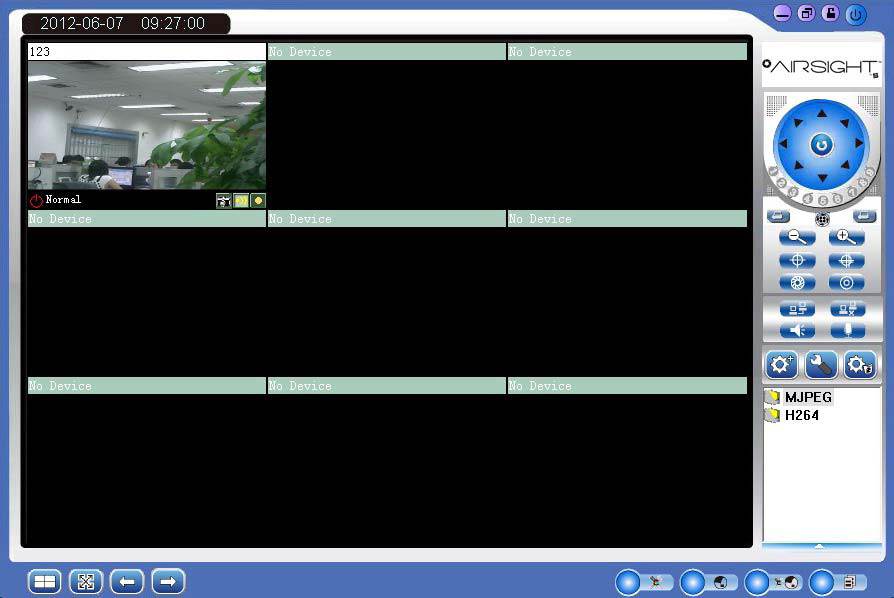
Move the mouse to the window where the camera name shows, then right-click, choose
Connect, it will show the live video:
To add more cameras, repeat the process again.
