Difference between revisions of "Airsight Camera Multi-Device Settings"
X10douglas (talk | contribs) |
|||
| (One intermediate revision by the same user not shown) | |||
| Line 1: | Line 1: | ||
== Question == | == Question == | ||
| − | |||
| − | + | '''How do I setup my my system to view multiple cameras from the same screen?''' | |
| + | |||
| − | |||
== Answer == | == Answer == | ||
| − | Multi-Device can only be set within Internet Explorer. Firefox, Safari, and Chrome, do not support ActiveX and cannot see these setting. | + | |
| + | '''Multi-Device can only be set within Internet Explorer.''' ''Firefox, Safari, and Chrome, do not support ActiveX and cannot see these setting.'' | ||
Click '''Multi-Device Settings''' to enter the interface: | Click '''Multi-Device Settings''' to enter the interface: | ||
| Line 16: | Line 16: | ||
This camera can support max. 9 channels device at the same time. | This camera can support max. 9 channels device at the same time. | ||
| + | |||
=Set Multi-Device in LAN= | =Set Multi-Device in LAN= | ||
| Line 65: | Line 66: | ||
[[Image:Mds13.png]] | [[Image:Mds13.png]] | ||
| + | |||
| + | [[category: Configuration]] | ||
Latest revision as of 20:54, 2 March 2015
Question
How do I setup my my system to view multiple cameras from the same screen?
Answer
Multi-Device can only be set within Internet Explorer. Firefox, Safari, and Chrome, do not support ActiveX and cannot see these setting.
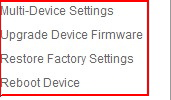
Click Multi-Device Settings to enter the interface:
This camera can support max. 9 channels device at the same time.
Set Multi-Device in LAN
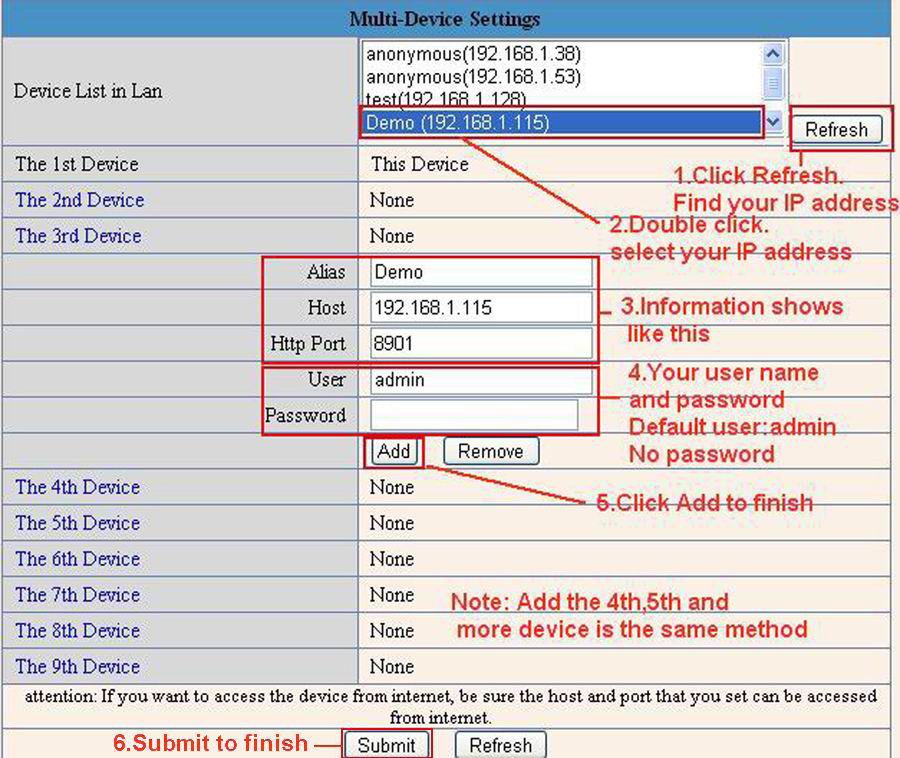
In the Multi-Device Settings page, you can see all devices searched in LAN. The 1st device is the default one. You can add more cameras listed in LAN for monitoring. This web software supports up to 9 IP Cameras online simultaneously.
Click The 2nd Device and click the item in the Device List in Lan, it will fill the Alias, Host, Http Port automatically, then input the correct user name and password, click Add. Set more devices in the same way, after you’re done, click Submit.
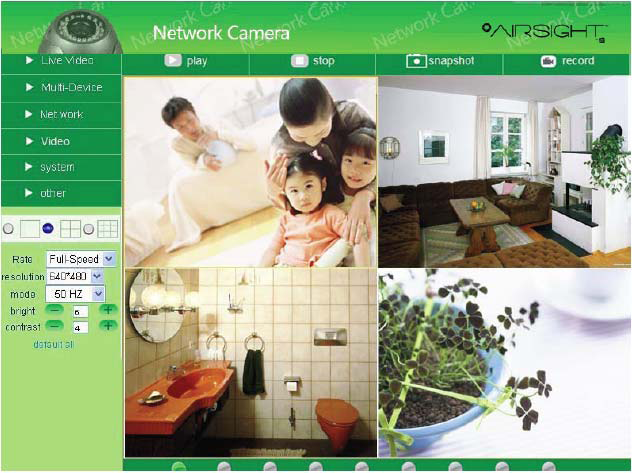
Click Live Video and then select ![]() to see four channels, or click
to see four channels, or click ![]() to see nine channels.
to see nine channels.
Set Multi-Device for WAN
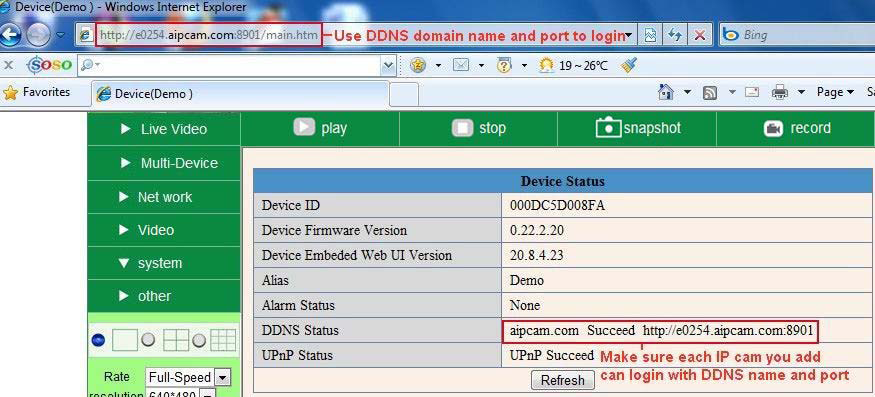
If you want to view cameras from internet, you have to add these devices by DDNS domain name. Make sure all these cameras you want to add have DDNS set successfully.
Login the first camera by DDNS domain name and port, this camera will be as the host camera.
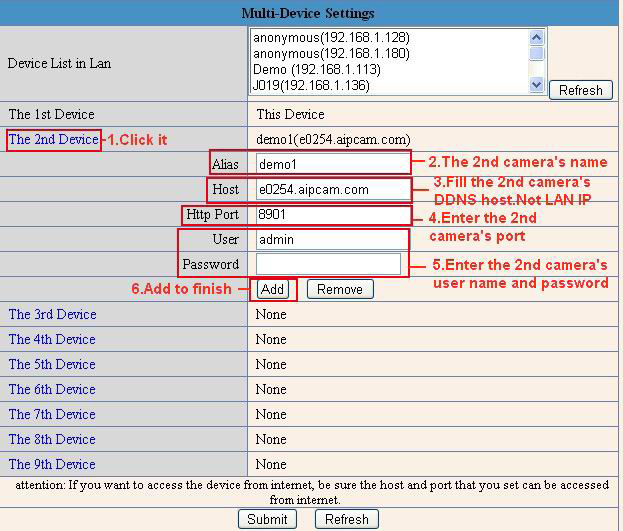
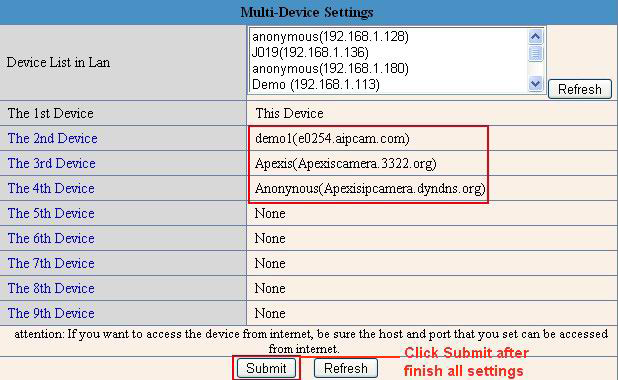
Click Multi-Device, select Multi-Device Settings. Choose the 2nd Device; fill in the 2nd camera’s Alias, Host, Http Port, User, Password, click Add. Set more devices in the same way, after all done, click Submit
NOTE: The Alias is optional; you can set the alias as you wish. The Host must be the camera’s DDNS domain name, and without “http://”, it’s not the LAN IP address. If you have several cameras, you can use the same DDNS domain name, just set different port number for each different camera.
Note: Add the other camera in the same way, Click submit to add all of them.
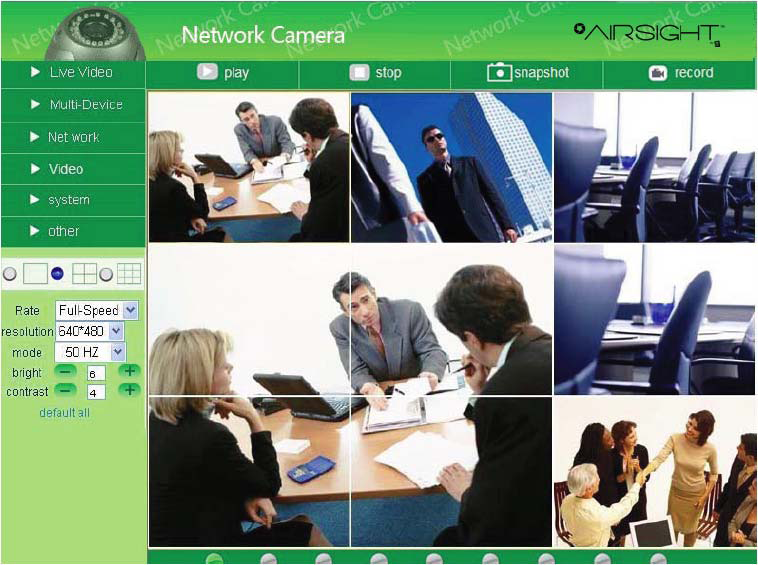
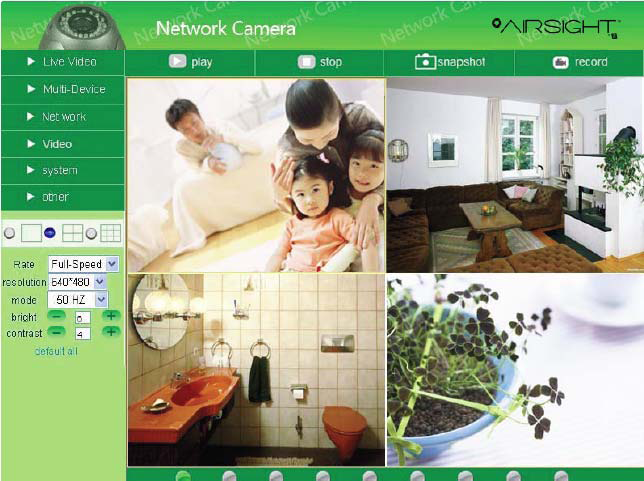
Click Live Video and then select ![]() to see four channels, or
to see four channels, or ![]() to see nine channels.
to see nine channels.
In this case, you can see all the cameras from a remote position by internet, for example, if you are on a business trip, you can use the first camera’s (Host camera) DDNS to view all the devices via the internet.
