Difference between revisions of "CR13A"
Jump to navigation
Jump to search
X10douglas (talk | contribs) |
X10douglas (talk | contribs) |
||
| Line 4: | Line 4: | ||
[[image:thumb_cr13a.jpg]][[image:CR13A.jpg|thumb]] | [[image:thumb_cr13a.jpg]][[image:CR13A.jpg|thumb]] | ||
| + | |||
| + | ==Product Pages== | ||
*[http://files.buyitsellit.com/8181/CR13A.pdf CR13A Owner's Manual] | *[http://files.buyitsellit.com/8181/CR13A.pdf CR13A Owner's Manual] | ||
| − | == | + | ==Specifications== |
;Weight: 0.26 lbs. | ;Weight: 0.26 lbs. | ||
Latest revision as of 02:26, 25 April 2014
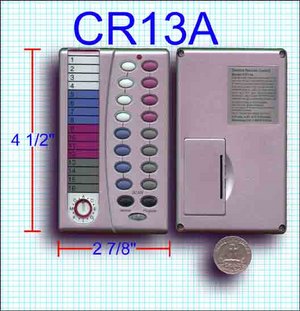
CR13A: 16 Camera Scanning Remote
Product Pages
Specifications
- Weight
- 0.26 lbs.
- FCC ID
- B4SSR12A
- Power Supply
- (4) AAA batteries
INSTRUCTIONS
When you first insert the batteries in the CR13A it defaults to control cameras connected to XM10A Modules that are set to Unit Codes 1, 2, 3, and 4, using the first 4 buttons on the left. You can however set it to control cameras set to any group of consecutive numbers between 1 and 16.
- Install 4 AAA alkaline batteries (sold separately) in the CR13A’s battery compartment.
- Use a dime to set the Housecode dial to match the Camera Power Supplies (XM13A), and Transceiver you want to control (both sold separately).
- Plug in an X10 Transceiver (RR501 or TM751).
- Set the CR13A’s slide switch to Normal (left).
- The CR13A defaults to control cameras set to 1 thru 4, so to control up to 4 cameras, plug each camera into its own XM10A Remote Controlled Power Supply. Pressing any number (in the group, 1 thru 4) turns that camera on and the other three cameras (in the group) off. Pressing any number outside the group turns all cameras off.
- Each press of either the black UP (or DOWN) button will turn on the next (or previous) camera in the group, while turning the current camera off. (You set all cameras to the same channel as the Video Receiver connected to your TV (Channel A, B, C, D).
- If you press any number that is NOT in the group (1-4) all 4 cameras turn off.
- To change the size of the group of cameras you want to control press that number button (e.g. 6) and hold it pressed while you flip the switch to the right (Program) and then back to the left (Normal). The red LED blinks to indicate that you have now set buttons 1 thru 6 to control cameras 1-6. Pressing the blue buttons will now scan cameras 1 thru 6.
*Note, if you set a group larger than 4 you will notice a slight pause between each group of 4 cameras when scanning. This is because all 4 cameras in the first group are turned off before the scanning of the second group commences.
Supported Cameras:

