Difference between revisions of "New Quick Start Guide"
Jump to navigation
Jump to search
X10douglas (talk | contribs) |
X10douglas (talk | contribs) |
||
| Line 30: | Line 30: | ||
| + | '''If your camera doesn't automatically appear in the camera list:''' [[Image:cameralist1.jpg]] | ||
#Click the [[Image:Addcampic.png]] "Add Camera" button | #Click the [[Image:Addcampic.png]] "Add Camera" button | ||
Revision as of 00:04, 28 April 2014
Quick Start Guide for XX51A XX52A and XX59A
Thank you for choosing AirSight as your IP WIFI Camera!

This guide is designed to help you setup your camera and view wirelessly on your Apple or Android device.
- Setup is simple and takes only minutes.
SET UP THE HARDWARE
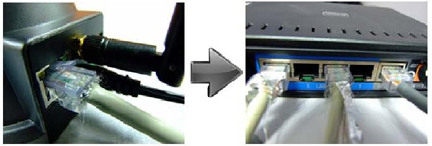
You need to set up your camera using a network cable (wired) first before you attempt to use it wirelessly.
- Attach the Wi-Fi antenna to the camera.
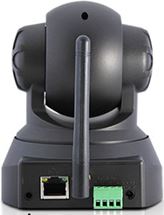
- Plug the included power adapter into the camera and into an AC outlet for power.

- Plug one end of the network cable into the camera, and the other end into your router/switch.


SET UP THE SOFTWARE (iOS and Android)
- Download the FREE App "IP Camera Viewer for X10 Airsight" - iPhone App Store | Android Google Play - (**New XX51A, XX52A, and XX59A Only**)

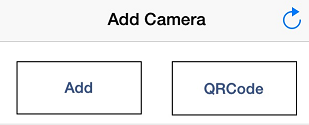
If your camera doesn't automatically appear in the camera list: 
- Click the
 "Add Camera" button
 - Click "QRCode"
- Allow the app to access your camera and scan the QR Code on the bottom of the camera
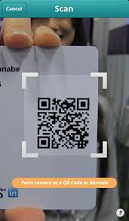
- When prompted - the default password is 000000


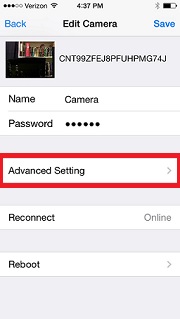
GO WIRELESS
- While the camera is still plugged into the router click the
 button.
 - Go to "Advanced Settings
- Select "WiFi
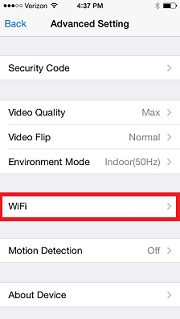
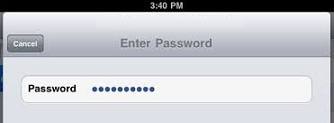
- Choose your WiFi network from the list and input your password.
- Unplug camera from the network cable.
- Power Down and Reboot your camera by unplugging the camera's AC adapter. Wait a few moments, then plug your camera's AC adapter back into your camera.
- Allow a few minutes for the camera to fully reboot.

- You are now Wireless!