Difference between revisions of "XCam2 and Vanguard ICC Setup"
X10douglas (talk | contribs) |
|||
| (5 intermediate revisions by 2 users not shown) | |||
| Line 12: | Line 12: | ||
If you have more than one camera, you should also have a TM751 transceiver module: | If you have more than one camera, you should also have a TM751 transceiver module: | ||
| − | + | [[Image:tm751.jpg]] | |
===Software Installation=== | ===Software Installation=== | ||
| − | First, download and install Vanguard ICC using the link you received by e-mail. | + | First, download and install Vanguard ICC using the link you received by e-mail. |
Click on the software link in the email you received titled "New Software Download Link." Before you download the software, choose the option to save the file, and save it onto your desktop so you can more easily access it later. | Click on the software link in the email you received titled "New Software Download Link." Before you download the software, choose the option to save the file, and save it onto your desktop so you can more easily access it later. | ||
| Line 30: | Line 30: | ||
When the installation program instructs you to, plug the USB Video Adapter into a USB port located directly on the back of your computer: | When the installation program instructs you to, plug the USB Video Adapter into a USB port located directly on the back of your computer: | ||
| − | + | [[Image:cable2.jpg]] | |
[[image:PlugVA12A.jpg]] | [[image:PlugVA12A.jpg]] | ||
| Line 38: | Line 38: | ||
[[image:Cm19aonpc.jpg]] | [[image:Cm19aonpc.jpg]] | ||
| − | ===Camera Installation=== | + | ===First Camera Installation=== |
| − | + | 1) Plug the receiver into wall power. Make sure the receiver is turned on; the power switch is next to the antenna hinge. | |
| − | + | [[image:Pluginvidrec.jpg]] | |
| + | |||
| + | 2) Connect the video receiver to the USB Video Adapter. Adjust the paddle-shaped so that it it faces in the general direction of all the cameras -- sometimes it may be best to point the antenna towards the ceiling. | ||
| + | |||
| + | [[image:Connectup.jpg]] | ||
| + | |||
| + | 3) Set up a camera. | ||
| − | + | [[Image:xcam_setup_02.jpg]] | |
| − | + | Plug the power supply into a free AC outlet. Connect the camera to the power supply. The camera should come on and you should be able to get the picture on your PC. Adjust the antenna so that it points better at the antenna of the receiver. | |
| − | + | Here is a full one-camera setup: | |
| − | [[image: | + | [[image:Alldone.jpg]] |
| + | |||
| + | If you only have one camera, skip to [[XCam2 and Vanguard ICC Setup#Software Configuration|Software Configuration]] below. | ||
| − | + | ===Multiple Camera Installation=== | |
| − | + | 4) Choose a House Code - a letter between A and P. Set the House Code on the wireless transceiver module (model TM751), plug it into an AC outlet and extend the antenna. | |
| − | + | [[Image:tm751.jpg]] | |
| − | + | 5) Set the House Code on your remote control (model CR12A, or CR14A) to the selected House Code and insert 4 AAA batteries. If the cameras are going to be units other than 1-4, follow the instructions that came in the remote’s box to change the scan controls. | |
| − | + | [[image:Thumb_cr12a.jpg ]] [[image:Thumb_cr14a.jpg ]] | |
| − | |||
| − | + | 6) Unplug the camera you have plugged in and set it to the House and Unit code you have selected. You want all the cameras, remotes, and the TM751 on the same House Code; the cameras should be at sequential Unit Codes (usually 1,2,3, etc.) Using your remote, try to switch to a camera that is NOT plugged in (for example, hit 2 ON or C2 if you have just installed a camera at Unit Code 1.) You should see the camera picture go away, indicating that the camera has received the signal from the TM751 transceiver. | |
| − | + | 7) Repeat step 6 with the other cameras you have. | |
===Software Configuration=== | ===Software Configuration=== | ||
| Line 74: | Line 81: | ||
[[Image:Options cam.gif]] | [[Image:Options cam.gif]] | ||
| − | Click on Camera A1 then change the camera`s type to XCam2 or Ninja, as appropriate. If you have more than one camera, add an entry for each of your cameras, then click OK. | + | Click on Camera A1 then change the camera`s type to XCam2 or Ninja, as appropriate. If you have moved the camera to a different House or Unit Code, select the correct address in the drop-down fields. If you have more than one camera, add an entry for each of your cameras, double-check each camera's House and Unit Code, then click OK. |
| + | |||
| − | |||
| − | + | ==Related Articles== | |
[[Vanguard Internet Control Center]] | [[Vanguard Internet Control Center]] | ||
Latest revision as of 01:42, 11 June 2014
Question
How do I set up my XCam2 cameras and Vanguard Internet Control Center?
Answer
Check for Parts
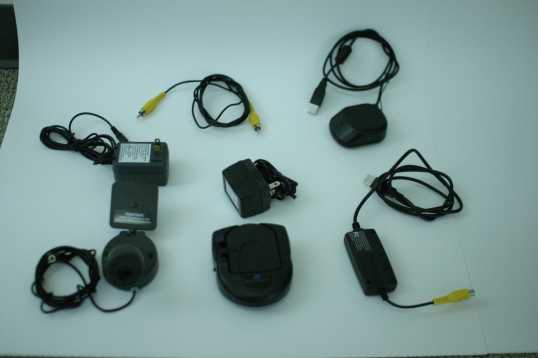
Make sure you have all these items:
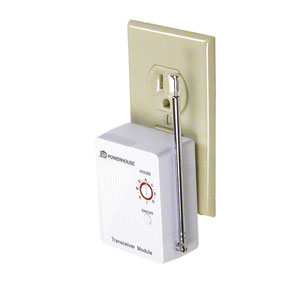
If you have more than one camera, you should also have a TM751 transceiver module:
Software Installation
First, download and install Vanguard ICC using the link you received by e-mail.
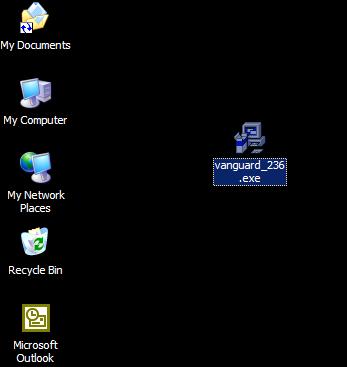
Click on the software link in the email you received titled "New Software Download Link." Before you download the software, choose the option to save the file, and save it onto your desktop so you can more easily access it later.
Disable or turn off your anti-virus software before you install the software as some anti-virus programs interfere with the installation. Remember to turn on your anti-virus program when you finish these steps.
Go to your desktop and double click the installation program you just downloaded. The software installation process will install the driver for your VA12A.
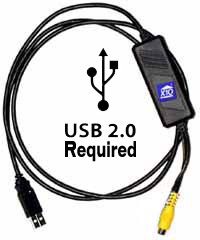
Once this is done you are ready to install the USB Video Adapter (model VA12A). Do not connect the USB Video Adapter before installing Vanguard ICC.
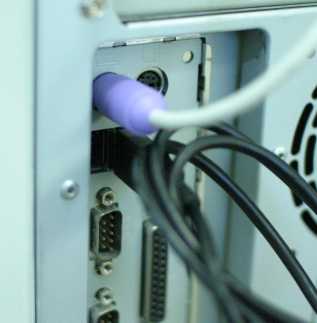
When the installation program instructs you to, plug the USB Video Adapter into a USB port located directly on the back of your computer:
The computer will recognize that new hardware has been installed and complete the installation. After the installation finishes, plug the CM19A FireCracker PC Transceiver into another USB port.
First Camera Installation
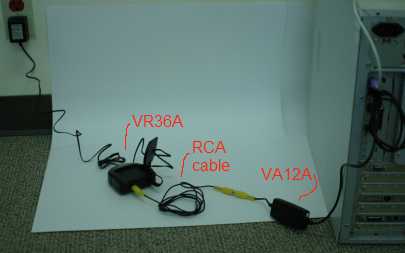
1) Plug the receiver into wall power. Make sure the receiver is turned on; the power switch is next to the antenna hinge.
2) Connect the video receiver to the USB Video Adapter. Adjust the paddle-shaped so that it it faces in the general direction of all the cameras -- sometimes it may be best to point the antenna towards the ceiling.
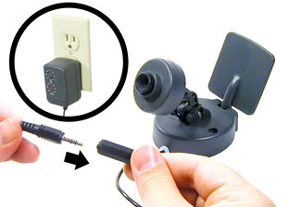
3) Set up a camera.
Plug the power supply into a free AC outlet. Connect the camera to the power supply. The camera should come on and you should be able to get the picture on your PC. Adjust the antenna so that it points better at the antenna of the receiver.
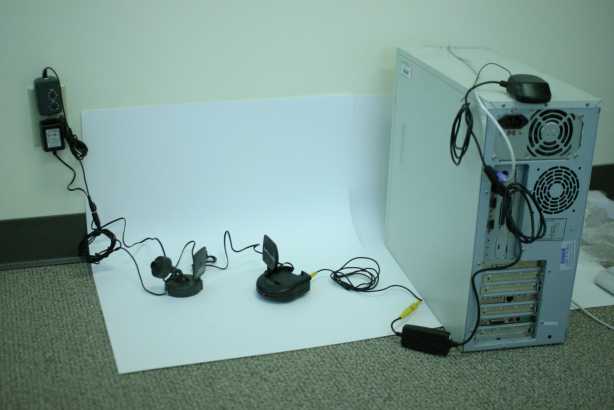
Here is a full one-camera setup:
If you only have one camera, skip to Software Configuration below.
Multiple Camera Installation
4) Choose a House Code - a letter between A and P. Set the House Code on the wireless transceiver module (model TM751), plug it into an AC outlet and extend the antenna.
5) Set the House Code on your remote control (model CR12A, or CR14A) to the selected House Code and insert 4 AAA batteries. If the cameras are going to be units other than 1-4, follow the instructions that came in the remote’s box to change the scan controls.
6) Unplug the camera you have plugged in and set it to the House and Unit code you have selected. You want all the cameras, remotes, and the TM751 on the same House Code; the cameras should be at sequential Unit Codes (usually 1,2,3, etc.) Using your remote, try to switch to a camera that is NOT plugged in (for example, hit 2 ON or C2 if you have just installed a camera at Unit Code 1.) You should see the camera picture go away, indicating that the camera has received the signal from the TM751 transceiver.
7) Repeat step 6 with the other cameras you have.
Software Configuration
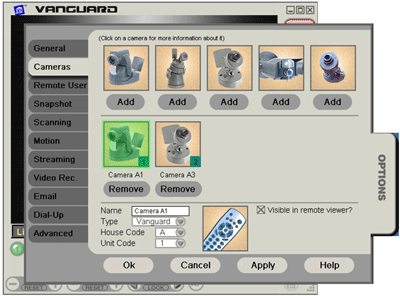
Run the Vanguard software. If you get an error message about the VA12A video adapter, please see this article. Register your software, click on the Option tab, then click on the Cameras subtab:
Click on Camera A1 then change the camera`s type to XCam2 or Ninja, as appropriate. If you have moved the camera to a different House or Unit Code, select the correct address in the drop-down fields. If you have more than one camera, add an entry for each of your cameras, double-check each camera's House and Unit Code, then click OK.
Related Articles
Vanguard Internet Control Center
Motion Recording In Vanguard ICC
Motion Recording In Vanguard ICC Troubleshooting
