Difference between revisions of "LegacyIP for X10 Airsight"
X10douglas (talk | contribs) |
X10douglas (talk | contribs) |
||
| (16 intermediate revisions by the same user not shown) | |||
| Line 1: | Line 1: | ||
| − | '''PLEASE NOTE:''' | + | '''PLEASE NOTE:''' You should use the '''LegacyIP''' app for all X10 AirSight IP cameras purchased prior to August 2013. |
| − | |||
| − | |||
LegacyIP is compatible with ALL older and newer cameras and should be used if you have both new and legacy cameras. | LegacyIP is compatible with ALL older and newer cameras and should be used if you have both new and legacy cameras. | ||
| + | ==Question== | ||
| − | + | '''How do I use my AirSight Camera with the LegacyIP App?''' | |
| − | |||
| − | |||
| − | |||
| − | |||
| − | + | ==Answer== | |
| + | ===Download the App=== | ||
| − | + | [[File:LegacyIPLogo.JPG]] | |
| − | |||
| + | '''Download the FREE App "LegacyIP"''' | ||
| − | ''' | + | * '''iPhone''' [https://itunes.apple.com/us/app/legacy-ip-camera-viewer/id641135955?mt=8 App Store] |
| + | * '''Android''' [https://play.google.com/store/apps/details?id=com.tutk.Airsight Google Play] | ||
| − | |||
| + | ===Install the Camera=== | ||
| − | + | [[File:NewInstall.png]] | |
| − | ''' | + | '''Add camera to the app. There are a few different ways to do this. Your camera may or may not be a P2P camera. ''If the camera is not a P2P camera you will need to add the camera's parameters manually which will be highlighted later in this article''. If the camera does feature P2P then you can use the "Scan QR Code" method.''' |
| + | |||
| + | '''P2P Cameras:''' | ||
| + | *[[XX51A]] | ||
| + | *[[XX52A]] | ||
| + | *[[XX59A]] | ||
| + | |||
| + | '''All other models skip to ''Manually Add Device''''' | ||
| + | |||
| + | |||
| + | |||
| + | ===Add a P2P Camera via QR Code=== | ||
| − | |||
This method makes setup extremely fast and easy. | This method makes setup extremely fast and easy. | ||
| Line 52: | Line 59: | ||
| − | |||
| − | |||
| − | + | ===Manually Add Device=== | |
| + | If your camera is not a P2P model camera then you will need to manually add the camera's information to the app. | ||
| − | '''NOTE''': If you plan on viewing the cameras remotely with the app you | + | '''NOTE''': If you plan on viewing the cameras remotely (outside of your local network) with the app you must first setup your cameras do so '''[[IP Camera - Remote Viewing|HERE]]''' and use the camera's external IP address instead of the local IP address. If your camera is not a P2P model you will need to do '''[[IP Camera - Remote Viewing|Port Forwarding]]''' for each cam first before you will be able to view the cameras remotely within the app. |
| + | #Start by clicking "ADD" | ||
| + | #Choose either '''MJPEG''' Network (XX34A, XX41A, XX36A, XX42A, XX40A) or '''H.264''' (XX59A, XX39A, XX49A, XX50A, XX69A, XX51A). | ||
| − | ''' | + | In the '''Add Device Info''' page input: |
| + | *Device name (the name of your choosing) | ||
| + | *Camera's IP address (found in the IP Cam Tool program on your computer) OR the external IP address used to view remotely | ||
| + | *Port number for your camera | ||
| + | *User name (default admin) | ||
| + | *Password (default blank OR admin) | ||
| + | *Click on the save button. | ||
| + | |||
| + | The camera is now saved in the app and you can connect to it in the devices page. | ||
| + | |||
| + | |||
| + | |||
| + | |||
| + | ===Automatically Search Device=== | ||
If your camera is not a P2P model camera than you will need to manually add the camera's information to the app. The easiest way to do this would be to search the network using the "search" feature on the add device page. | If your camera is not a P2P model camera than you will need to manually add the camera's information to the app. The easiest way to do this would be to search the network using the "search" feature on the add device page. | ||
| Line 74: | Line 95: | ||
| − | + | ||
| + | ===Connect to the Camera=== | ||
Touch the "Devices" icon at the bottom of the screen to connect (view) the camera. Just click on the camera to fully view and access it's feature. | Touch the "Devices" icon at the bottom of the screen to connect (view) the camera. Just click on the camera to fully view and access it's feature. | ||
| Line 81: | Line 103: | ||
| − | |||
| − | |||
| − | |||
| − | |||
| + | ===Operate the Camera=== | ||
| − | |||
| + | While your phone is in vertical orientation you can take a snapshot, record video, listen and talk with two-way audio, and zoom (zoom models only), by clicking on any one of the small icons located under the video. While the phone is in horizontal orientation you can still pan/tilt/zoom but you can not access any other settings. | ||
| − | + | [[File:NewVideoInfo.png]] | |
| − | |||
| − | |||
| + | ===App Info=== | ||
'''App. Information and Version''' Touch “Info.” to view the App version. | '''App. Information and Version''' Touch “Info.” to view the App version. | ||
| − | [[ | + | [[File:NewInfo.png]] |
==Related Products== | ==Related Products== | ||
| Line 114: | Line 132: | ||
*[[XX40A|AirSight Outdoor PTZ (XX40A)]] | *[[XX40A|AirSight Outdoor PTZ (XX40A)]] | ||
*[[XX50A|Airsight Outdoor PTZ HD P2P (XX50A)]] | *[[XX50A|Airsight Outdoor PTZ HD P2P (XX50A)]] | ||
| + | *[[XX60A|Airsight Outdoor '''NEW''' PTZ P2P (XX60A)]] | ||
Latest revision as of 19:19, 29 September 2015
PLEASE NOTE: You should use the LegacyIP app for all X10 AirSight IP cameras purchased prior to August 2013.
LegacyIP is compatible with ALL older and newer cameras and should be used if you have both new and legacy cameras.
Question
How do I use my AirSight Camera with the LegacyIP App?
Answer
Download the App
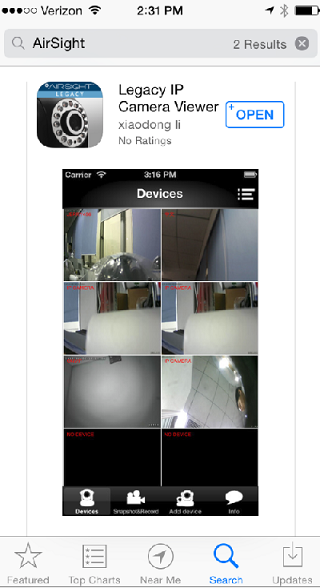
Download the FREE App "LegacyIP"
- iPhone App Store
- Android Google Play
Install the Camera
Add camera to the app. There are a few different ways to do this. Your camera may or may not be a P2P camera. If the camera is not a P2P camera you will need to add the camera's parameters manually which will be highlighted later in this article. If the camera does feature P2P then you can use the "Scan QR Code" method.
P2P Cameras:
All other models skip to Manually Add Device
Add a P2P Camera via QR Code
This method makes setup extremely fast and easy.
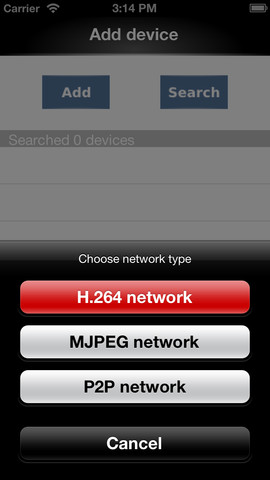
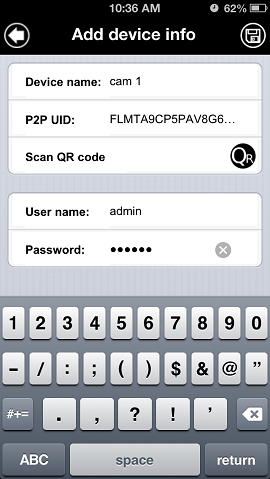
Click "add" and choose "P2P Network" from the list of options. Click "Scan QR Code" (i.e., take a photo of) the QR code on the mounting bracket the camera, the App will add the camera automatically. You then need to enter the user name and password manually (default username: admin, password: 000000, you can
change this later). Touch the save icon on the top right hand side of the screen to save the camera settings.
Manually Add Device
If your camera is not a P2P model camera then you will need to manually add the camera's information to the app.
NOTE: If you plan on viewing the cameras remotely (outside of your local network) with the app you must first setup your cameras do so HERE and use the camera's external IP address instead of the local IP address. If your camera is not a P2P model you will need to do Port Forwarding for each cam first before you will be able to view the cameras remotely within the app.
- Start by clicking "ADD"
- Choose either MJPEG Network (XX34A, XX41A, XX36A, XX42A, XX40A) or H.264 (XX59A, XX39A, XX49A, XX50A, XX69A, XX51A).
In the Add Device Info page input:
- Device name (the name of your choosing)
- Camera's IP address (found in the IP Cam Tool program on your computer) OR the external IP address used to view remotely
- Port number for your camera
- User name (default admin)
- Password (default blank OR admin)
- Click on the save button.
The camera is now saved in the app and you can connect to it in the devices page.
Automatically Search Device
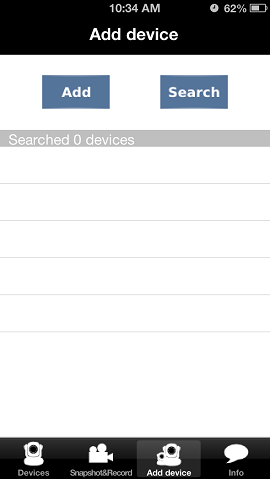
If your camera is not a P2P model camera than you will need to manually add the camera's information to the app. The easiest way to do this would be to search the network using the "search" feature on the add device page.
Go to add device and start by clicking "search" and choose either MJPEG Network (XX34A, XX41A, XX36A, XX42A, XX40A) or H.264 (XX59A, XX39A, XX49A, XX50A, XX69A, XX51A). Be sure that your wireless device is on the same wifi network as the cameras or the app will not be able to find your cameras.
The app will automatically list all the cameras found in your wifi network. Click on the device you would like to add. Input the user name and password and ensure all other parameters there are filled in correctly.
Connect to the Camera
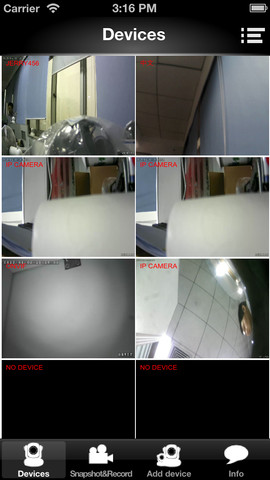
Touch the "Devices" icon at the bottom of the screen to connect (view) the camera. Just click on the camera to fully view and access it's feature.
Operate the Camera
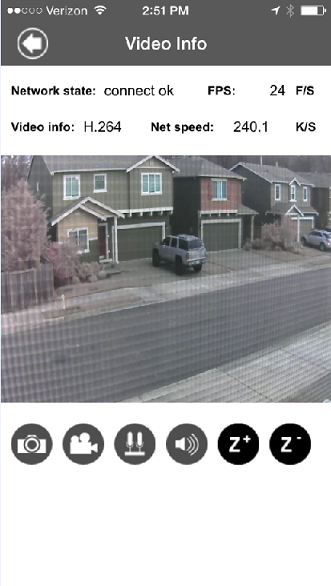
While your phone is in vertical orientation you can take a snapshot, record video, listen and talk with two-way audio, and zoom (zoom models only), by clicking on any one of the small icons located under the video. While the phone is in horizontal orientation you can still pan/tilt/zoom but you can not access any other settings.
App Info
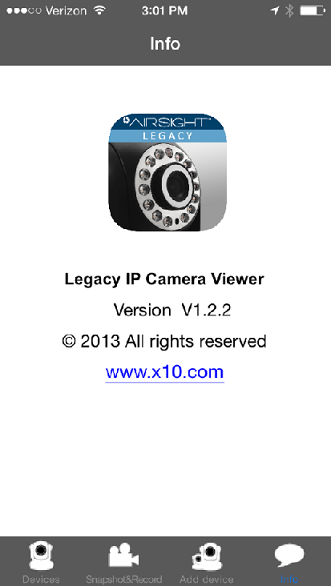
App. Information and Version Touch “Info.” to view the App version.
Related Products
- AirSight Indoor (XX34A)
- AirSight Indoor WideEye (XX41A)
- AirSight Indoor WideEye P2P (XX51A)
- AirSight Outdoor (XX36A)
- AirSight Outdoor WideEye (XX42A)
- AirSight Outdoor WideEye P2P (XX52A)
- AirSight Indoor SD (XX39A)
- AirSight Indoor P2P SD (XX49A)
- AirSight Indoor WideEye HD SD P2P (XX59A)
- AirSight Outdoor PTZ (XX40A)
- Airsight Outdoor PTZ HD P2P (XX50A)
- Airsight Outdoor NEW PTZ P2P (XX60A)

