Difference between revisions of "Pan and Tilt Cruise Controls/Presets for IPCam Client"
X10douglas (talk | contribs) |
X10douglas (talk | contribs) |
||
| Line 41: | Line 41: | ||
'''Stop Alarm:''' Click this to stop alarm. When there is alarm active, you can click it to stop it. | '''Stop Alarm:''' Click this to stop alarm. When there is alarm active, you can click it to stop it. | ||
'''Device Settings:''' Click this to pop-up the Device Settings interface. | '''Device Settings:''' Click this to pop-up the Device Settings interface. | ||
| − | '''Advanced Settings:''' Click this to pop-up the advanced settings contents as below: | + | '''Advanced Settings:''' Click this to pop-up the advanced settings contents as below (''Not available in for all models''): |
Revision as of 19:03, 11 June 2015
Question
How do change my Cruise Controls within the IPCam Client software?
Answer
If you view your cameras within the IPCam client software rather than the web based interface you may follow these instructions to edit your pan and tilt settings:
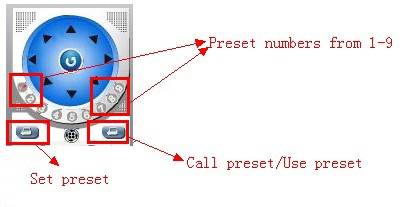
On the rightside panel, there are some icons for preset, details as shown below:
Numbers 1-9: Means the preset positions, this software supports up to 9 presets.
Set Preset: Click this to set the preset position.
Use Preset: Click this to call the preset position.
STEPS:
1. Select the number you want to set, such as 1.
2. Rotate the camera to a special position you want to set as preset.
3. Click Set preset icon to set this position as preset 1. Do the same steps for other
presets, such as preset 2, preset 3…
4. If you want to check the preset 3, select the number 3 first, then click use preset icon,
then the camera will rotate to the appointed position that you set.
SHORTCUT KEY ON SCREEN
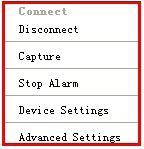
Move the mouse to the window where the camera name is shown, then right-click, to show the pop-up the window as below:
Connect: Click this to connect to the device set already.
Disconnect: Click this to disconnect the device which is showing live video.
Capture: Click this to take a snapshot, pictures will be saved to the appointed file.
Stop Alarm: Click this to stop alarm. When there is alarm active, you can click it to stop it.
Device Settings: Click this to pop-up the Device Settings interface.
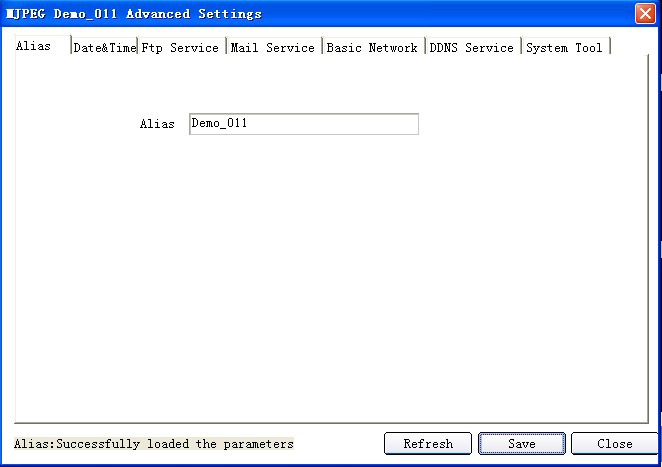
Advanced Settings: Click this to pop-up the advanced settings contents as below (Not available in for all models):
Advanced Settings:
NOTE: For all the advanced settings details, please check the user manual for your model of camera.
Alias: Set the device name.
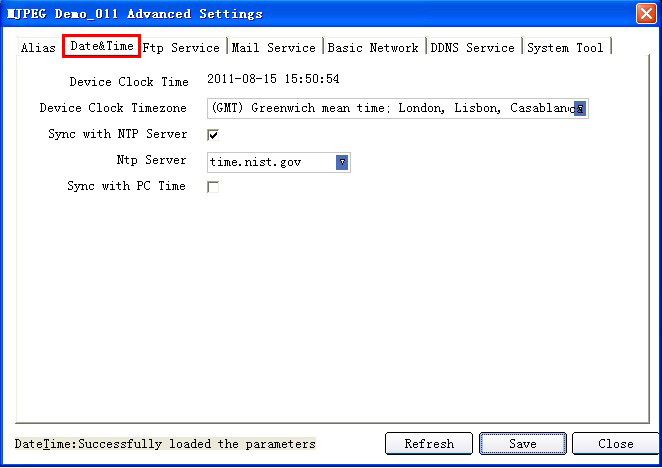
Date & Time: Set the date & time for the device.
1. Set time zone. 2. Synchronization with NTP server. 3. Synchronization with PC time. (The PC connected to the camera)
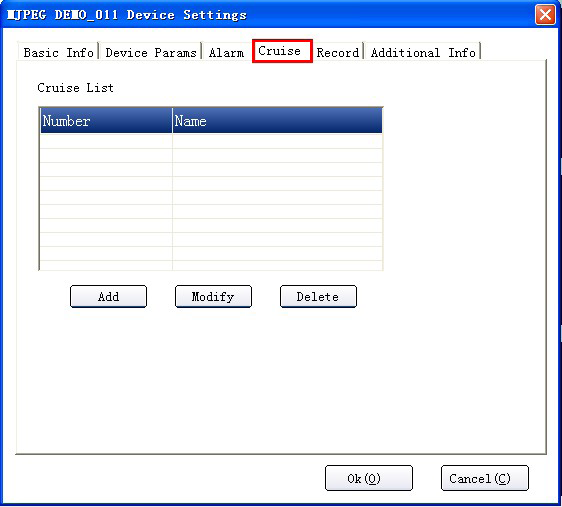
If you would like to set the camera to automatically pan between the preset positions, you can enable Cruise function on your camera.
Click Cruise, or click the icon on the rightside panel ![]() this will show the information as below:
this will show the information as below:
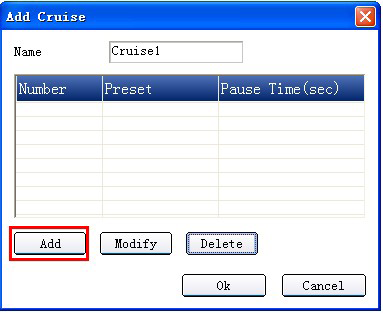
Clicking Add will pop-up the add cruise window:
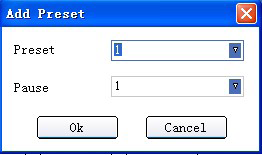
Up to 10 cruise positions are supported. Click Add to set a preset cruise position.
Preset: Choose the preset you set already, this can be from 1-9.
Pause: Set the duration for each preset, this can be from 1-60 seconds.
NOTE: Before using the cruise function, you need to set preset first, up to 9 presets can be set.
