Difference between revisions of "Showtime TV/Video Kit Setup"
(→Setup) |
X10douglas (talk | contribs) |
||
| Line 1: | Line 1: | ||
==Introduction== | ==Introduction== | ||
| + | |||
This guide should help you get started quickly with the X10 Showtime TV/Video Kit. | This guide should help you get started quickly with the X10 Showtime TV/Video Kit. | ||
==Setup== | ==Setup== | ||
| − | + | ||
| − | + | [[Image:in61_1.jpg]] | |
| + | |||
Unpack these items. | Unpack these items. | ||
| − | + | [[Image:in61_2.jpg]] | |
Download ShowTime from the link in the e-mail (subject 'New Software Download Link') sent to you shortly after the order was completed. Choose to Save the file when you download, and save it to your Desktop so you can access it later. Run the installation program. | Download ShowTime from the link in the e-mail (subject 'New Software Download Link') sent to you shortly after the order was completed. Choose to Save the file when you download, and save it to your Desktop so you can access it later. Run the installation program. | ||
| − | + | [[Image:in61_3.jpg]] | |
Plug in the USB Transceiver (wait until the ShowTime installer asks you to connect it). | Plug in the USB Transceiver (wait until the ShowTime installer asks you to connect it). | ||
| − | + | [[Image:van_3.jpg]] | |
Put batteries (not included) into the remote control. | Put batteries (not included) into the remote control. | ||
| − | + | [[Image:in61_5.gif]] | |
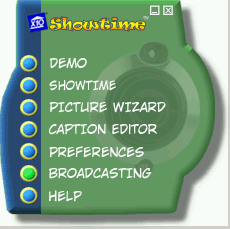
Run ShowTime from the link on your Desktop.Click the Showtime button to open the viewer. | Run ShowTime from the link on your Desktop.Click the Showtime button to open the viewer. | ||
| − | + | [[Image:in61_6.jpg]] | |
Press Start on the Showtime remote and use it to select Albums and view pictures. Use the Showtime Demo and Help for complete instructions. | Press Start on the Showtime remote and use it to select Albums and view pictures. Use the Showtime Demo and Help for complete instructions. | ||
| − | + | [[Image:in61_7.jpg]] | |
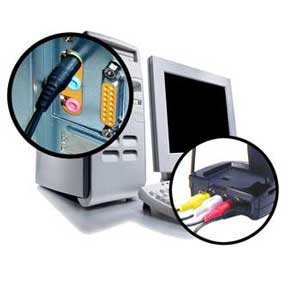
Connect the video transmitter to your computer's audio out jack. | Connect the video transmitter to your computer's audio out jack. | ||
| − | + | [[Image:in61_8.jpg]] | |
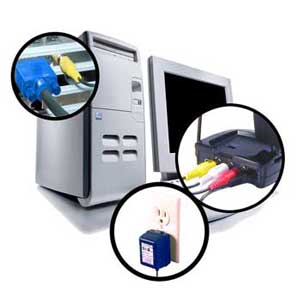
Connect the video transmitter to your computer's video out jack, plug it into power, and turn it on (the On/Off switch is on the side of the unit). | Connect the video transmitter to your computer's video out jack, plug it into power, and turn it on (the On/Off switch is on the side of the unit). | ||
| − | + | [[Image:in61_9.jpg]] | |
Connect the wireless video receiver to power and plug it into a wall outlet. | Connect the wireless video receiver to power and plug it into a wall outlet. | ||
| − | + | [[Image:in61_10.jpg]] | |
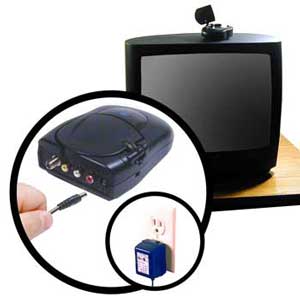
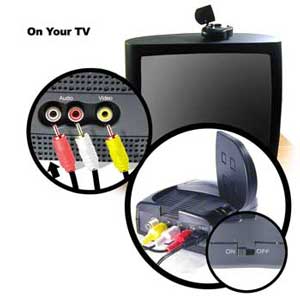
Connect the video receiver to your TV. | Connect the video receiver to your TV. | ||
| − | + | [[Image:6_video_select.jpg]] | |
| + | |||
| − | |||
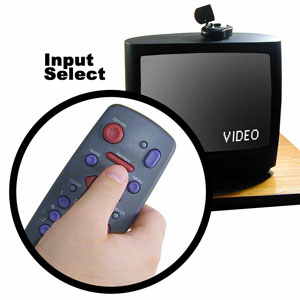
Select your TV's video input (or try channel 0 and then Channel Down). The image you see in the Showtime software should appear. | Select your TV's video input (or try channel 0 and then Channel Down). The image you see in the Showtime software should appear. | ||
If you have any trouble getting your system to work, follow each step again and check each connection. | If you have any trouble getting your system to work, follow each step again and check each connection. | ||
| + | |||
==Related Articles== | ==Related Articles== | ||
Latest revision as of 22:57, 29 May 2014
Introduction
This guide should help you get started quickly with the X10 Showtime TV/Video Kit.
Setup
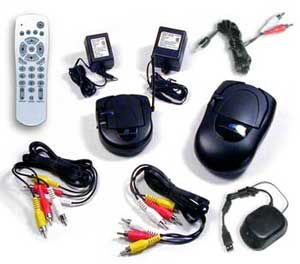
Unpack these items.
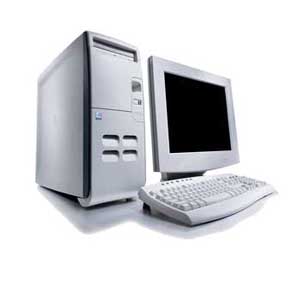
Download ShowTime from the link in the e-mail (subject 'New Software Download Link') sent to you shortly after the order was completed. Choose to Save the file when you download, and save it to your Desktop so you can access it later. Run the installation program.
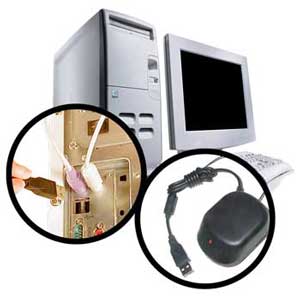
Plug in the USB Transceiver (wait until the ShowTime installer asks you to connect it).
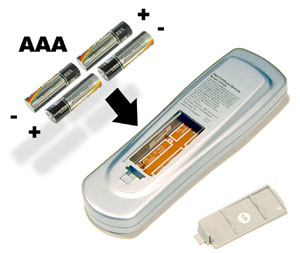
Put batteries (not included) into the remote control.
Run ShowTime from the link on your Desktop.Click the Showtime button to open the viewer.
Press Start on the Showtime remote and use it to select Albums and view pictures. Use the Showtime Demo and Help for complete instructions.
Connect the video transmitter to your computer's audio out jack.
Connect the video transmitter to your computer's video out jack, plug it into power, and turn it on (the On/Off switch is on the side of the unit).
Connect the wireless video receiver to power and plug it into a wall outlet.
Connect the video receiver to your TV.
Select your TV's video input (or try channel 0 and then Channel Down). The image you see in the Showtime software should appear.
If you have any trouble getting your system to work, follow each step again and check each connection.
