Difference between revisions of "Video Calling System Setup"
X10douglas (talk | contribs) |
|||
| Line 4: | Line 4: | ||
video capture adapter to your computer system. | video capture adapter to your computer system. | ||
| − | + | [[Image:include_wbw.jpg]] | |
'''Unpack these items.''' | '''Unpack these items.''' | ||
| Line 16: | Line 16: | ||
finish these steps. | finish these steps. | ||
| − | + | [[Image:launch_wbw.gif]] | |
'''Install Software.''' Go to your desktop and double click the installation program you just downloaded. | '''Install Software.''' Go to your desktop and double click the installation program you just downloaded. | ||
The software installation process will install the driver for your VA11A. | The software installation process will install the driver for your VA11A. | ||
| − | + | [[Image:va11a_wbw.gif]] | |
'''Windows XP Users:''' When you see a notice that the X10 VA11A Video Capture driver has not passed | '''Windows XP Users:''' When you see a notice that the X10 VA11A Video Capture driver has not passed | ||
| Line 28: | Line 28: | ||
| − | + | [[Image:pluginVC.jpg]] | |
Plug the USB end of the VA11A Video Converter to your PC (wait until the installation program asks you to connect it). | Plug the USB end of the VA11A Video Converter to your PC (wait until the installation program asks you to connect it). | ||
| − | + | [[Image:ylw_ends2.jpg]] | |
Connect the yellow female video cable from VA11A to one end of the yellow male video cable. Connect | Connect the yellow female video cable from VA11A to one end of the yellow male video cable. Connect | ||
the other end of the yellow male video cable to the input jack on the camera. | the other end of the yellow male video cable to the input jack on the camera. | ||
| − | + | [[Image:van_2.jpg]] | |
Connect the camera to its power supply and plug it into a wall outlet. | Connect the camera to its power supply and plug it into a wall outlet. | ||
| − | + | [[Image:cm19a_fixed.jpg]] | |
Install the CM19A by plugging the USB cable from it into an available USB slot on your PC. | Install the CM19A by plugging the USB cable from it into an available USB slot on your PC. | ||
Please ensure that you have run the setup software before you plug the CM19A into your PC. | Please ensure that you have run the setup software before you plug the CM19A into your PC. | ||
| − | + | [[Image:van_3.jpg]] | |
Put 4 AAA batteries (not included) into the remote control. | Put 4 AAA batteries (not included) into the remote control. | ||
| Line 55: | Line 55: | ||
</div> | </div> | ||
| + | |||
[[Video_Calling_System|Return to Video Calling System Main Menu]] | [[Video_Calling_System|Return to Video Calling System Main Menu]] | ||
Latest revision as of 21:28, 10 June 2014
Setup
IMPORTANT! Please download and install the Video Calling System software before you plug in the VA11A video capture adapter to your computer system.
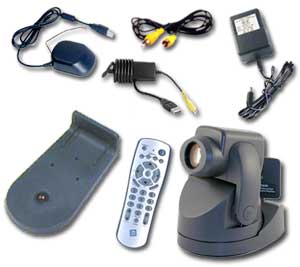
Unpack these items.
Download X10 Software. Click on the software link in the email you received titled "New Software Download Link." Before you download the software, choose the option to save the file, and save it onto your desktop so you can more easily access it later.
Disable or turn off your anti-virus software before you install the software as some anti-virus programs interfere with the installation. Remember to turn on your anti-virus program when you finish these steps.
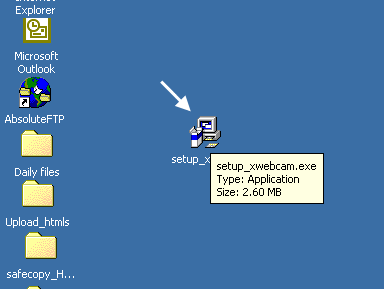
Install Software. Go to your desktop and double click the installation program you just downloaded. The software installation process will install the driver for your VA11A.
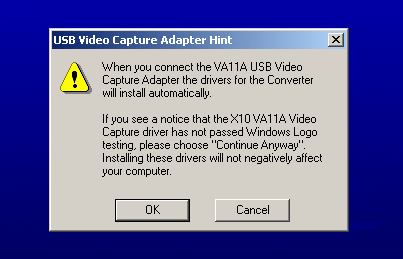
Windows XP Users: When you see a notice that the X10 VA11A Video Capture driver has not passed Windows Logo testing, click "Continue Anyway." Installing these drivers will not negatively affect your computer. Continue to click "Continue Anyway" until entire installation is completed.
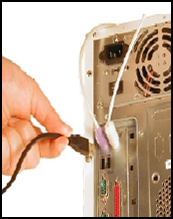
Plug the USB end of the VA11A Video Converter to your PC (wait until the installation program asks you to connect it).
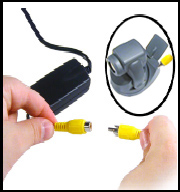
Connect the yellow female video cable from VA11A to one end of the yellow male video cable. Connect the other end of the yellow male video cable to the input jack on the camera.
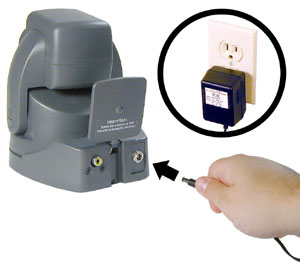
Connect the camera to its power supply and plug it into a wall outlet.
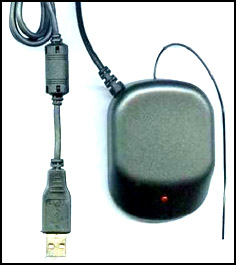
Install the CM19A by plugging the USB cable from it into an available USB slot on your PC. Please ensure that you have run the setup software before you plug the CM19A into your PC.
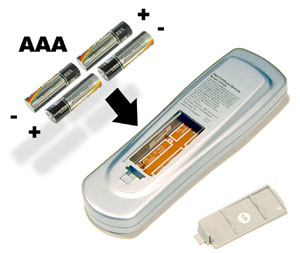
Put 4 AAA batteries (not included) into the remote control.
Congratulations - you are now ready to use your video calling system! All you need to do is run your X10 software by using the entry in your Windows Start Menu, or double-click the icon on your desktop to open the program.
When the program opens you should see the camera's image in its own window, complete with virtual navigation pan and tilt arrows.
