SC1200 As A Personal Assistance Voice Dialer
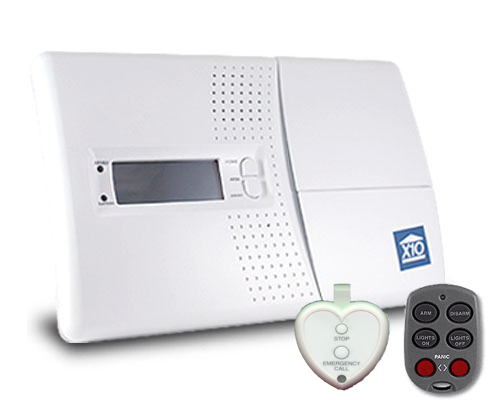
The X10 SC1200A Supervised Security Console with automatic dialer calls friends or relatives in the event of a break in, and plays a message (in your voice). Your friend or neighbor can listen in to your home through the Console’s microphone, and call the police if there’s a problem. Accessories include battery powered Radio Frequency (RF) Door/Window Sensors, battery powered RF Motion Detectors, and RF Keyfob Remote Controls for arming and disarming the system. Some of the accessories available are shown below. The models you purchase may vary from those shown below. See your owner’s manual or visit www.x10.com for more information.
The SC1200 has many uses. It can be used as a supervised security console, or a personal assistant voice dialer. It can also be used as a timer, phone controller or mounted controller for x10 modules. The SC1200 is a versatile system and is the central hub for your x10 automation and security systems.
For these purposes we will go into detail on how to setup the system to work as a personal assistant voice dialer. This allows a person to press a single button on either a heart pendant (HP564) or keyfob remote (KR32A) to trigger 3-way assistance by flashing lights, screaming siren, and personal monitoring. The Personal Assistance can call up to 6 numbers that you program into the system and play a pre-recorded message to each person, then allow each person to "listen" in so they can hear what's going on. You could have the system call your cell phone at work, then 2 of your neighbors, then three other family members. It's like your own monitoring service, yet with no monthly fees
Connecting up
1. Open the center lid on the Console. Attach the power supply’s cord to the connector labeled power supply. Plug the power supply into any AC outlet. (Use only the included power supply).
2. Attach the phone cord (supplied) to the connector labeled phone. Plug the other end into an unused phone jack.
3. Install 4 AA alkaline batteries (not supplied) in the Console’s battery compartment. Close the battery cover. If you open the cover again after applying power, TAMPER appears in the display. Enter the PIN (0000) to remove TAMPER from the display. The display then shows HOME CONTROL in the top line and the time of day below it.
Registering the devices
All features (except Home Control) require access to the Menu mode. To do this, press either of the Menu Start up or down buttons. The display then shows ENTER PIN (Personal Identification Number) in the top line. The default PIN is 0000, see your owner’s manual if you want to change this, but for now press 0000 on the keypad. This clears the top line and shows * for each number entered. After pressing a Menu Start up or down button and entering the PIN, the First Level Menu (INSTALL) is displayed.
1. To select a menu option, press the up or down Menu Start button repeatedly to step through the menu items 1 through 9.
2. Once you arrive at the menu item you desire, press OK to select it.
3. To leave the First Level Menu, repeatedly press the Clear button. Press either of the Menu up/down buttons. The display then shows ENTER PIN in the top line. Press 0000 on the keypad. This clears the top line and shows * for each number entered. When you see INSTALL on the display, press OK.
Registering a Keyfob Remote: (HP564 or KR32A)
With the consol set to install press any button on the Keyfob remote. The Console acknowledges that it has been registered by beeping and displaying RMOT 1 SET. Repeat this for any other Keyfob Remotes you want to register. The display increments to RMOT 2 SET, etc., as you register more remotes.
When completed press Clear to back out of the install menu. This will take you back to the main menu. Go down to option 3. PHONE NUMS
Press an up or down Menu button to select the desired sub-menu:
PHONE 1
PHONE 2
PHONE 3
PHONE 4
PHONE 5
PHONE 6
Press OK at the desired number (1-6). The display shows SET PH1, SET PH2, etc. Enter the phone number, up to 16 digits. off/pm gives a pause. Press OK. This takes you to the next phone number to be stored.
Press Clear to back out of the menu.
Press the down menu button until you reach the MESSAGE menu, and then press OK. Press 1 for RECORD , then press OK. The display shows: “PLEASE WAIT”
Then it will display “SPEAK NOW”
Clearly speak your message into the Console’s microphone (up to 12 seconds max.). A typical message could be: “There’s an alarm in progress at (your address), at the end of this message please press any button on your touch-tone phone to listen in.” After you’ve finished speaking (12 seconds max), wait for the display to go back to the MESSAGE SUB MENU.
Now press 2 for REPLAY. It then plays back your recorded message. After playing the message it will go back to the MESSAGE SUB MENU
Press Clear to back out of the menu. You are asked to confi rm, 1. YES, 2 NO. Pressing 1 takes you back to the HOME CONTROL screen.
You have now completed the setup and are able to use this system as a personal assistant voice dialer. For more information on how to use the system in other ways visit our knowledge base at kbase.x10.com or for phone assistance contact us at 1-800-675-3044.
