XX70A Getting Started
XX70A: AirSight Outdoor PTZ P2P HD IP Camera with One Button Setup - Quick Installation Guide (Using IE Browser)
Introduction
You can access your camera's live video feed from a web browser on your computer by following these steps.
Setup instructions for your tablet or smartphone can be found here.
Step 1: Hardware Installation
We strongly recommend setting up your camera wirelessly via the APP first using the One Button Setup feature.
If you prefer to instead setup from your PC you will need to use a network cable (wired) first before you attempt to use it wirelessly.
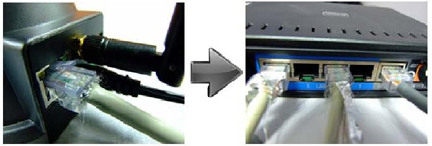
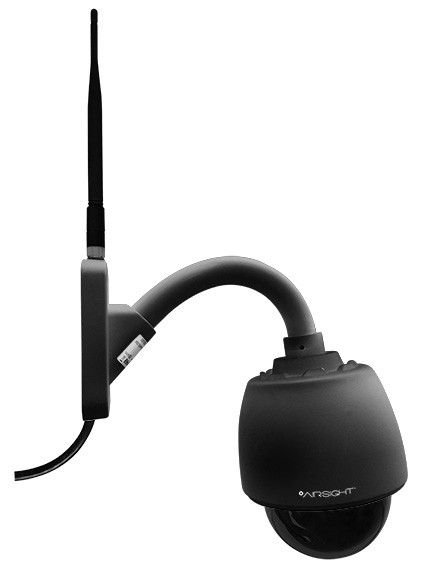
- Install the Wi-Fi antenna.
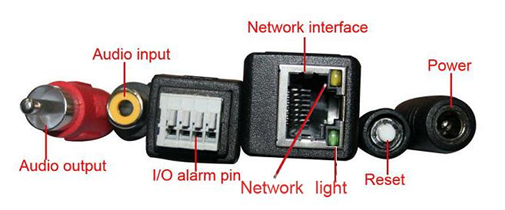
- Plug the power adapter into the camera and into an AC outlet.
- Plug one end of the network cable into the camera, and the other end into your router/switch.
Step 2: Software Installation
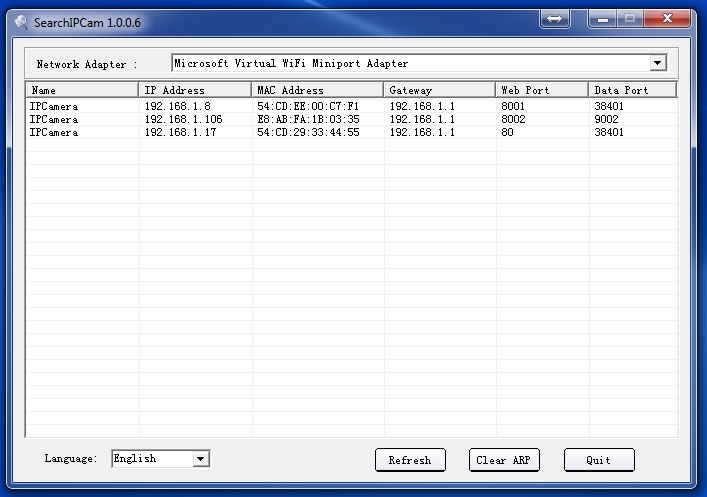
Run the SearchIPCam tool found here: SearchIPCam.exe
Double click on your camera's IP address to log into your camera via an Internet Explorer browser
If the web interface opens in a different browser, like Firefox or Chrome, simply COPY / PASTE the link in the address bar into an Internet Explorer browser.
Step 3: Real-time Video Demonstration
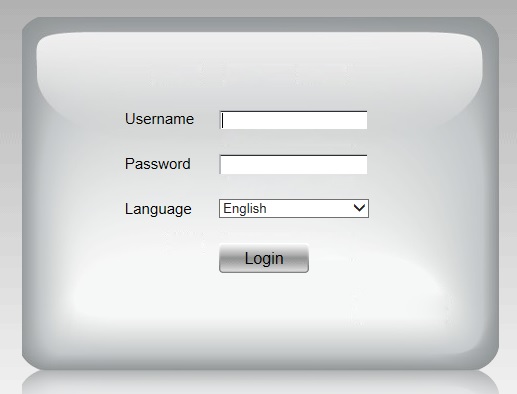
You will be prompted to enter the camera's Username and Password:
Username: admin
Password: leave this field blank
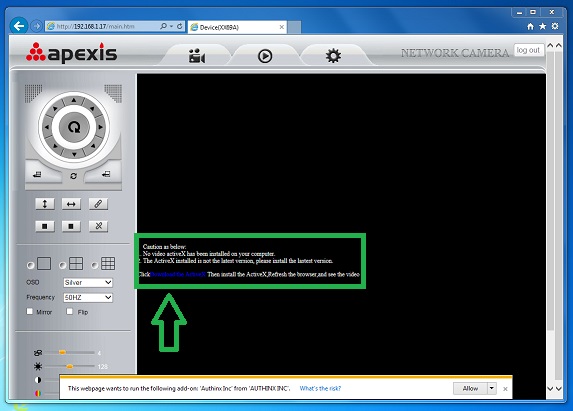
The first time you connect to your camera using an Internet Explorer browser you will be prompted to download and install the ActiveX control required to view your camera.
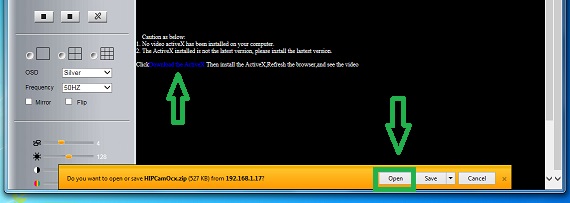
Click Download the ActiveX and choose OPEN
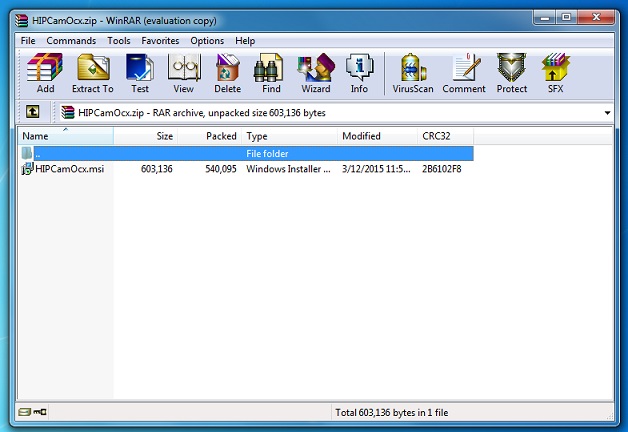
The file will load in your file compressor utility application (WinZip, WinRar, Windows Explorer, etc.)
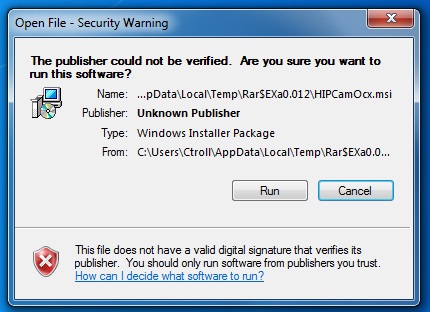
Double Click the HIPCamOcx.msi ActiveX plugin to install it on your PC - If you receive a message about an Unknown Publisher click RUN
Once you've finished installing the plug-in, refresh the browser and re-enter your Username and Password:
Step 4: How to use your camera Wirelessly
You should set up your camera using a network cable (wired) first before you attempt to use it wirelessly. (See Hardware Installation above).
- Make sure your router is a wireless router.
- Make sure the Wi-Fi antenna is installed on the camera.
- Determine if your router uses encryption, (see your router’s owner’s manual for how to do this), if it uses encryption, note the share key.
- Login to the camera using the SearchIPCam tool, like you did when setting up with a network cable.
- Click the SETTINGS icon at the top of the screen:

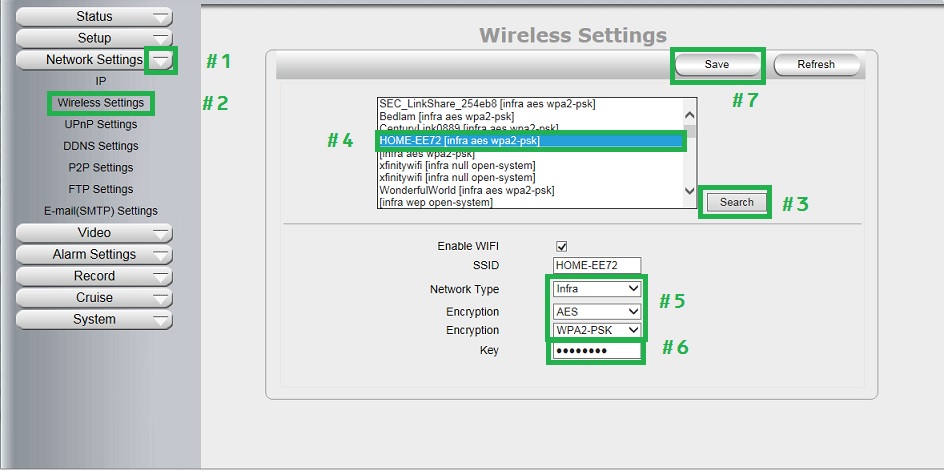
When you see the screen below:
- Click the "Network Settings” drop down menu
- Choose the "Wireless Settings" menu
- Click on “Search”
- Once your WiFi Network Name (SSID) populates in the Wireless LAN box, click on it.
- Ensure the NETWORK TYPE and ENCRYPTION fields match what is listed in the Wireless LAN box.
- Enter your WiFi Network Password or Share Key
- Click SAVE
Wait for your camera to FULLY REBOOT - Once it is done center itself - UNPLUG THE POWER CABLE FIRST - then disconnect the network cable and plug the power back in.
