Google Remote
The X10 Multimedia Remote Control gives you quick control over your PC and your favorite programs. The X10 Media Remote is easy to set-up, and easy to use.
Setting Up The Hardware
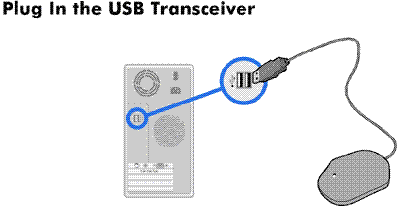
If you haven't already done so, find the USB plug on your USB Transceiver and plug it into a USB port on your computer. When you plug in the USB Transceiver, Windows will tell you that it has found new hardware and the installation will continue automatically. When it’s done, continue on with the rest of the Media remote setup.
Note: Place the USB Transceiver as far away from your computer and monitor as its cord allows.
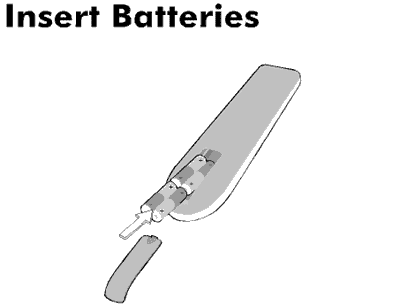
Push the tab and lift off the battery cover. Insert four AAA alkaline batteries, taking care to match the + and - marks in the battery compartment. Press PC on the remote.
Using the Media Remote
After the Media Remote Software is installed, the Media Remote program will run automatically on your computer. When it's running, the program will automatically control applications when you use it -- you don't have to select which program to use or change modes on the remote.
The Media Remote controls the application that is currently "on top" in Windows. This is the program that you used most recently. If you want to change which program the Media Remote is controlling, just click on the program to bring it to the front.
If no program is open, or the program on the front doesn't have special controls, the Media Remote has the following default functions:
- Up arrow
- Up
- Down arrow
- Down
- Left arrow
- Left
- Right arrow
- Right
- OK
- Enter
The mouse pad and mouse button functions work in all programs. Volume controls and mute control the Windows master volume settings.

